| NeuroScript MovAlyzeR Help | Send comments on this topic. |
Glossary Item Box
| NeuroScript MovAlyzeR Help | Send comments on this topic. |
Testing a Subject
This topic is ONLY for GripAlyzeR.
Testing a new subject/Running an experiment can be done by the Run Experiment Wizard or manually.
* Run a subject using Run-Experiment Wizard
* GripAlyzeR Experiment Procedure: Example
Run a subject using Run-Experiment Wizard
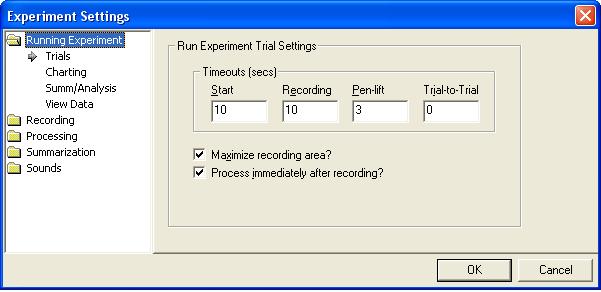
o Adjust the experiment settings if required, by going to experiment > Experiment settings > run experiment settings
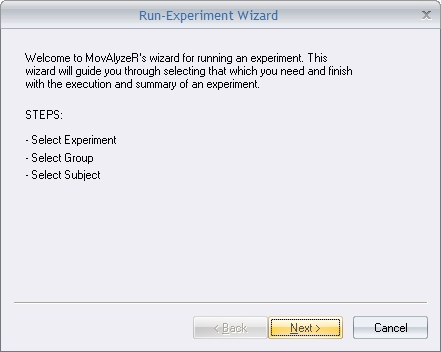
o Start MovAlyzeR >File >Run Experiment Wizard
o Click 'Next'
o Step 1: Click 'New Experiment' > Type ID 'E01' and any Description > Click OK
o Step 2: Click 'New Condition' >Type ID 'C01', and any Description > Click OK
Type #Repetitions (Number of trials per condition to be recorded, default = 2) > Click Next
o Step 3: Click 'New Group' >Type ID 'G01' and any Description >Click OK
o Step 4: Click 'New Subject' >Type ID 'S01', First and Last Names >Click OK
o Click Finish
o NOTE: This feature allows you to add only one group, one subject and one condition using the wizard.
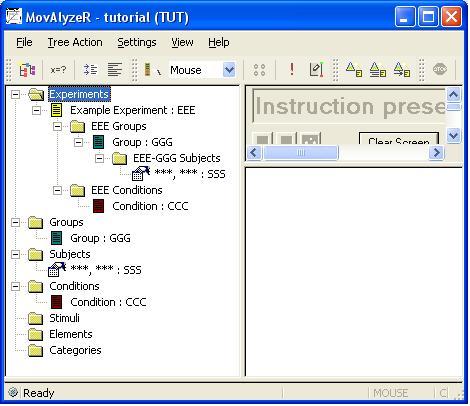
o At the end of this procedure, your Left window experiment tree should look like this:
o Click 'Finish'
o Start MovAlyzeR >double-click Experiments >double-click a particular experiment >double-click Groups
o Define a new subject or double-click Subjects
o Make any last-minute adjustments to the settings by going to experiment > Experiment settings > run experiment settings. Refer to Experiment settings for information on the parameters.
o Right-click a particular subject > Run Experiment
o During running of an experiment, adjustments can be made in the Experiment Control Window or the Toolbar.
o If the subject does not produce the required pattern, a red mark appears in front of the trial, otherwise a green mark.
o Chart trials by double clicking the particular trial item.
o At the end of the experiment, the Error Report and the Extracted Features are shown per condition.
GripAlyzeR Experiment Procedure: Example
You can use the following procedure to make a recording using the gripper device
a. Before the recording starts,
o Instruct the participant to grab bottom unit of the Gripper from the table, placing the non-dominant hand with thumb on the bottom unit sensor, the other fingers on the other side of the unit and lift the gripper. Then place the top unit on the bottom unit.
o The experimenter then starts the experiment, by clicking on a particular subject > Run experiment.
o The participant is allowed to view the experiment instructions on the screen and the experimenter clicks OK to start the recording.
b. After a 'start recording' signal -- a beep or .wav sound as set in experiment settings, is heard:
o The participant has to grab the top unit of the Gripper with the dominant hand, similarly to that of the bottom unit.
o Then pull the top unit off the the bottom unit.
o The participant holds the units apart until the end-of-recording signal. (A message 'DONE: Press ENTER key to continue) is seen on the instruction screen.
{At this point, the trial is paused as we have set the option 'Delay trial until enter key is pressed' in the Experiment settings - Recording. This option is necessary for consistent data}.c. To prepare for the next trial
o The participant places the top unit on top of the bottom unit.
o The experimenter hits the 'ENTER' key to start the next trialRepeat step b. and c. until all the trials are done. To test the system, you can do this example experiment with 5-10 trials.
~NOTE: If the experimenter performs the experiment as a participant, for step c. : Place the top unit on the bottom unit. Then, keep the whole unit in the non-dominant hand, while using the dominant hand to hit 'ENTER' to start the next trial.
~NOTE: If the 'double buffer mode' option is chosen in input device > DAQPad settings, you can notice the visual feedback of the sensor signals on the screen in the recording window area. The blue line represents the lower gripper, the green line represents the upper gripper and the red line corresponds to the load sensor data.
Visual Feedback after recording
o If the option 'Single buffer mode' is chosen in the input device settings for the DAQPad, then there is no real time feedback, but after the recording stops, a visual feedback of the x-y data is displayed on the screen with sampling points (analogous to the feedback in handwriting experiments).
Real-Time Feedback during recording
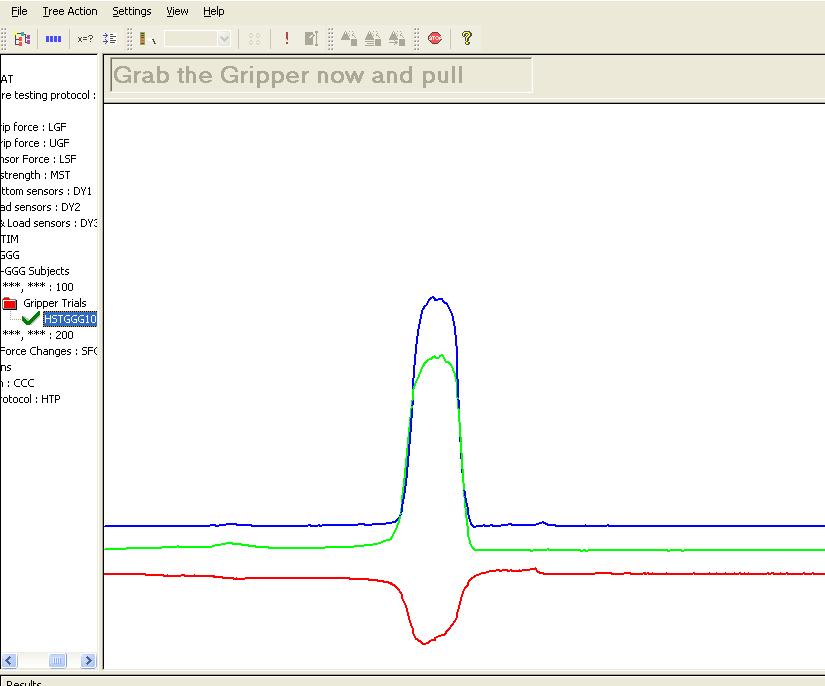
o If the option 'Double buffer mode' is chosen in the input device settings for the DAQPad, then a real time feedback is displayed on the recording screen, with x,y and z axes data plotted against time in real-time.
The blue line represents the lower gripper, the green line represents the upper gripper, and the red line corresponds to the load sensor data.
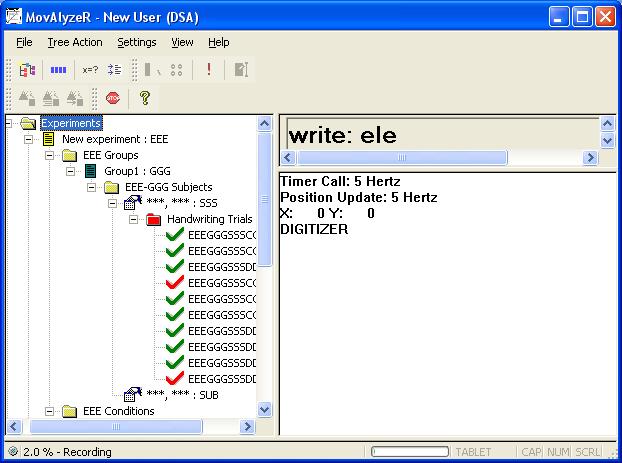
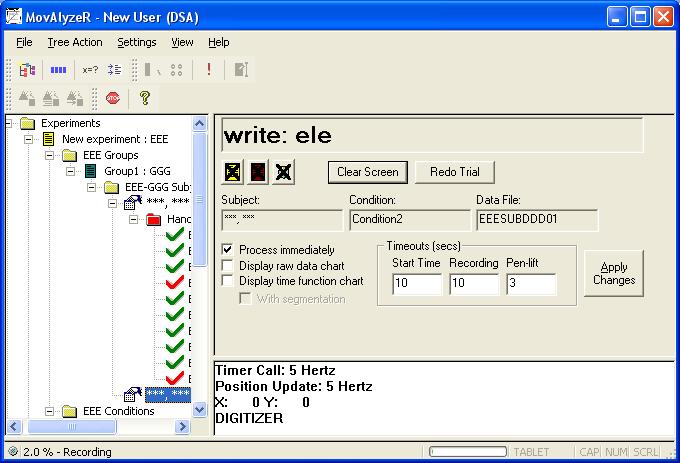
o This feature is extremely useful for determining the relative forces applied on the sensors while recording and the associated noise. The figure below shows a snapshot of the GripAlyzer window during the recording.
o The text box on top displays the instruction to the user and participant. On the left is the sequence of trials with the correct trials marked green.
o Sliding the splitter down shows additional controls that can be altered during the experiment and become in effect after clicking Apply Changes.
o Click on Stop Experiment, Stop Condition, Stop Recording if required.
o A trial can be redone immediately by clicking with the pen or mouse on "Redo Trial". You can also redo any other trial via the Data Navigator submenu.
o You can switch on/off immediate processing. Immediate processing shows after each trial whether the trial was performed correctly. You can also chart the raw data as they are stored, or the processed data and derived time functions with or without segmentation points.
o After every change, click 'Apply changes'
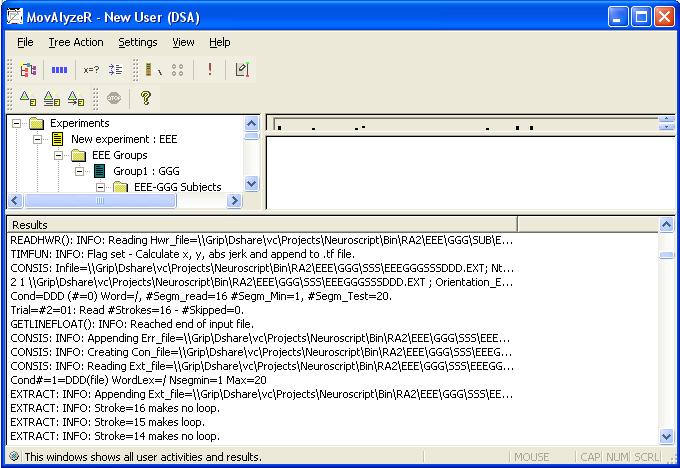
o The Actions Log shows every elementary processing step and an indication of the status for the various processing modules. The top line is the most recent line.
o This log may be useful in determining run time information about the experiment.
o Each line is also time stamped and written to a file (Actions.Log) in the program directory and is vital for identifying problems, which should be e-mailed to NeuroScript. Otherwise, the user may switch logging off by File >Logging >Log Actions to File.
o To view the total Actions.log history including time stamps:
File >Logging >View Log File. The most recent entry is at the end of the file. Select, copy, and paste parts into e-mail messages if you want to report comments to NeuroScript.There is also an option to send the complete Actions.log file to NeuroScript.
o The current size is visible in the bottom status bar under Message Log. Files exceeding 5.00 Mb can be cleared totally (via Clear Log File) or partly (via View Log File).
o To add comments at any time: File >Logging >Add Comments.
| See Also |
Getting Started: Testing Digitizer/Mouse | MovAlyzeR to Test Digitizers
© NeuroScript LLC. All Rights Reserved.